1/24th Scale Me109 build thread
Moderators: Board of Directors, Command

-
Broadsword
- Posts: 3124
- Joined: Wed Sep 03, 2014 7:54 pm
- Location: Cheshire, UK
Re: Models exposed.
Beautifully done Secu 

I must go up to the skies again, to the peace of silent flight, To the gull’s way, and the hawk’s way, and the free wings’ delight;
And all I ask is a friendly joke with a laughing fellow rover, And a large beer, and a deep sleep, when the long flight’s over.
Re: Models exposed.
Great work Secu! And Cerberus! Two very patient people:D
“It is a mistake to think you can solve any major problems just with potatoes I-16s.” - Douglas Adams


Re: Models exposed.
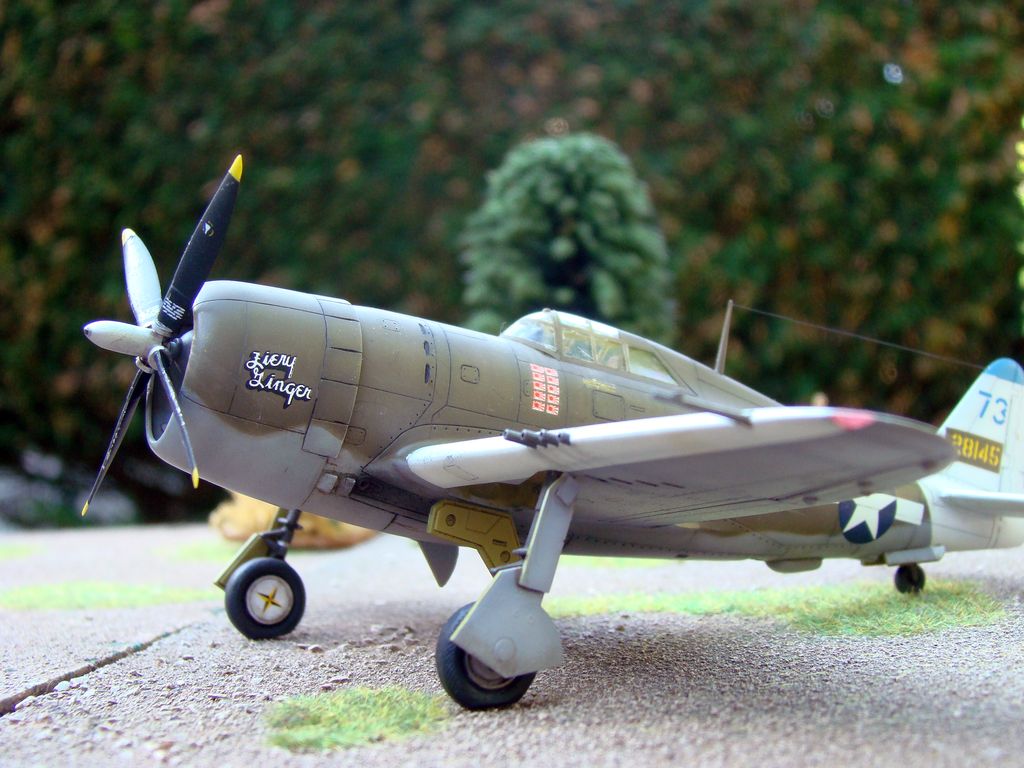
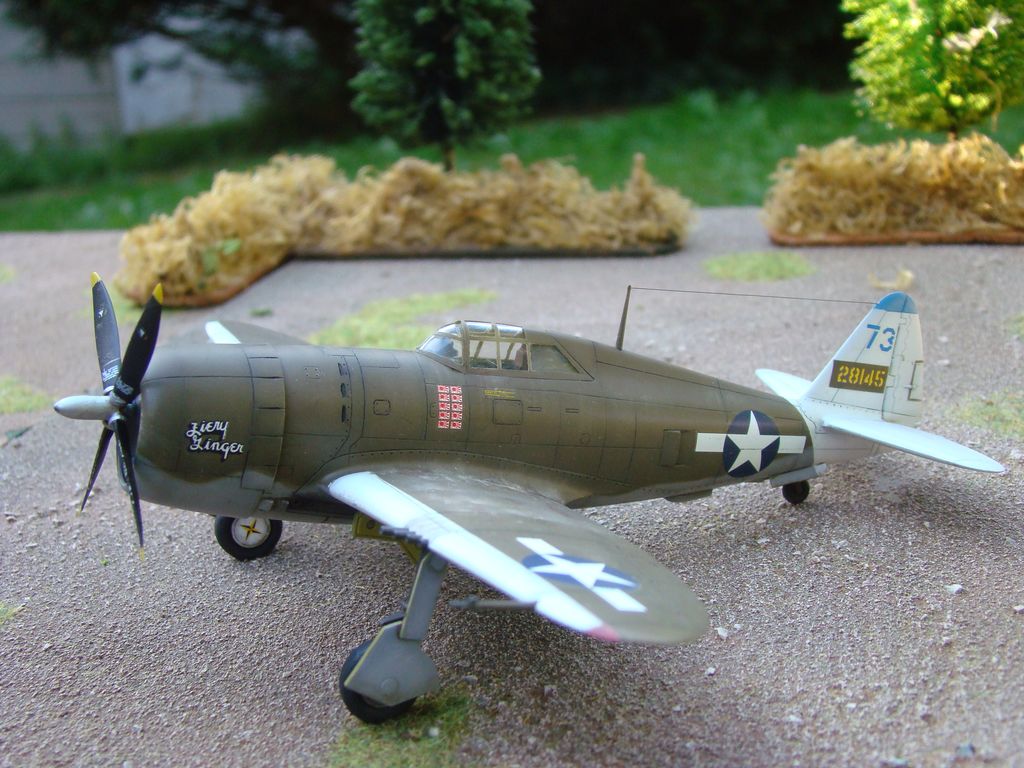
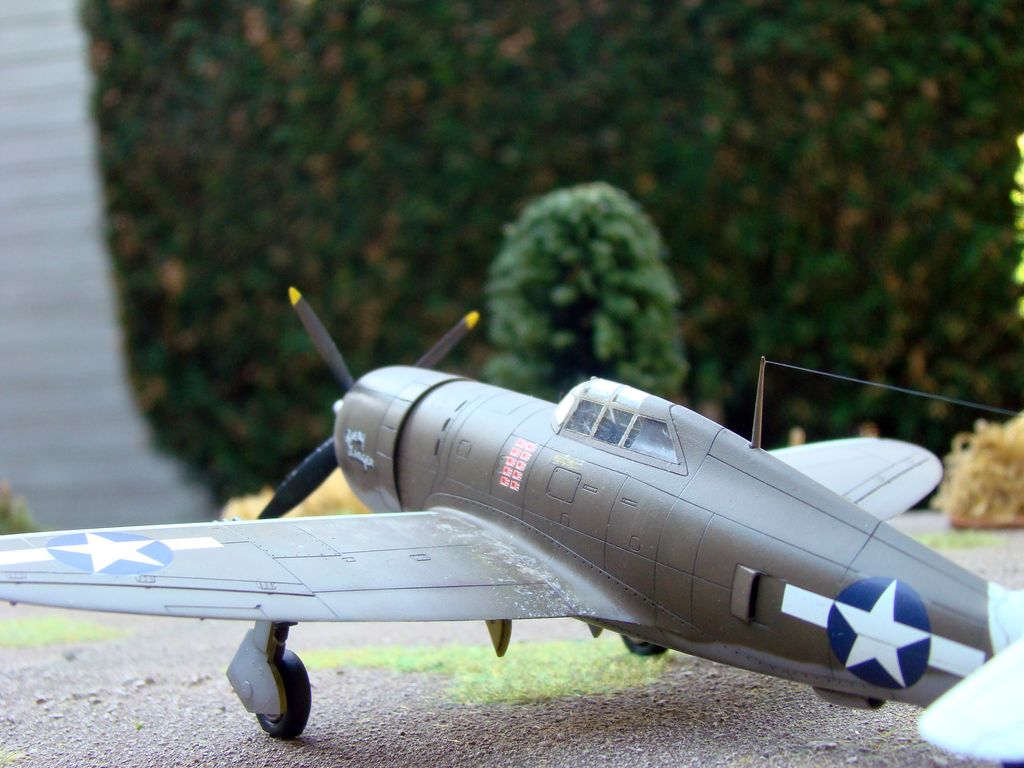
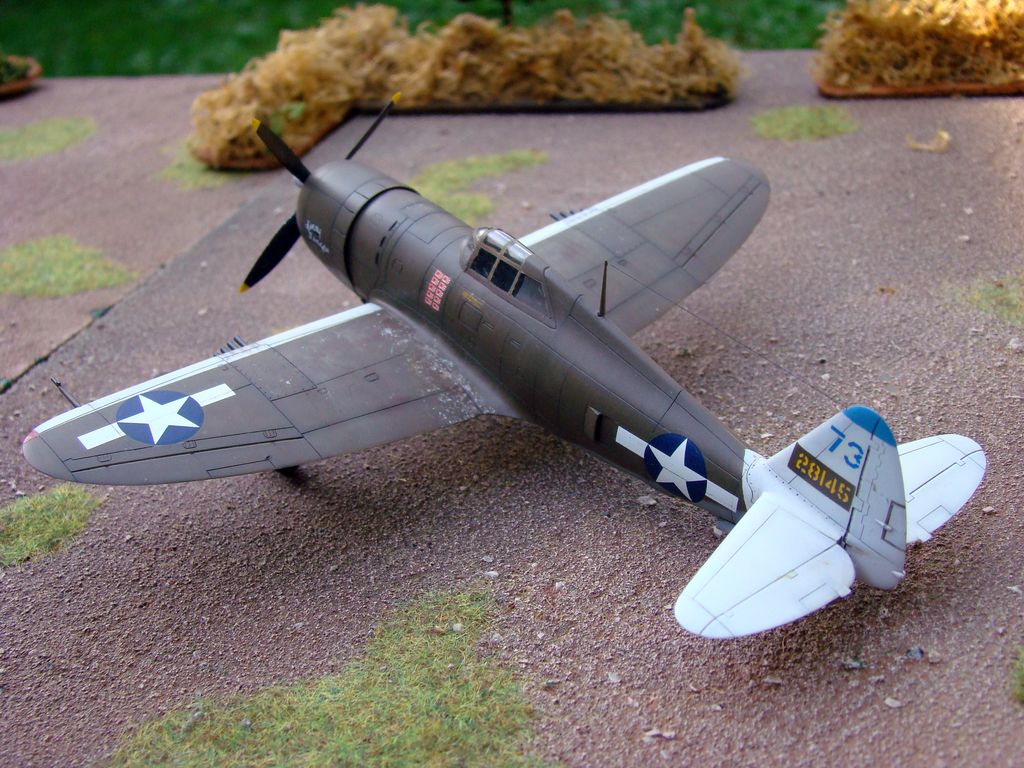
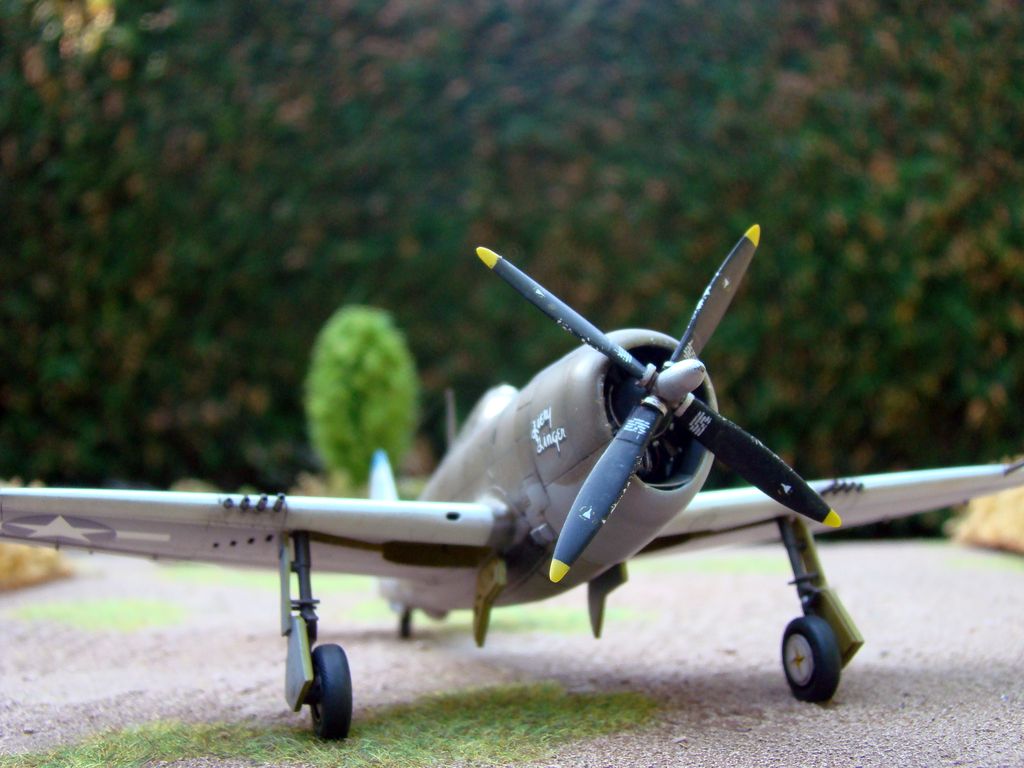
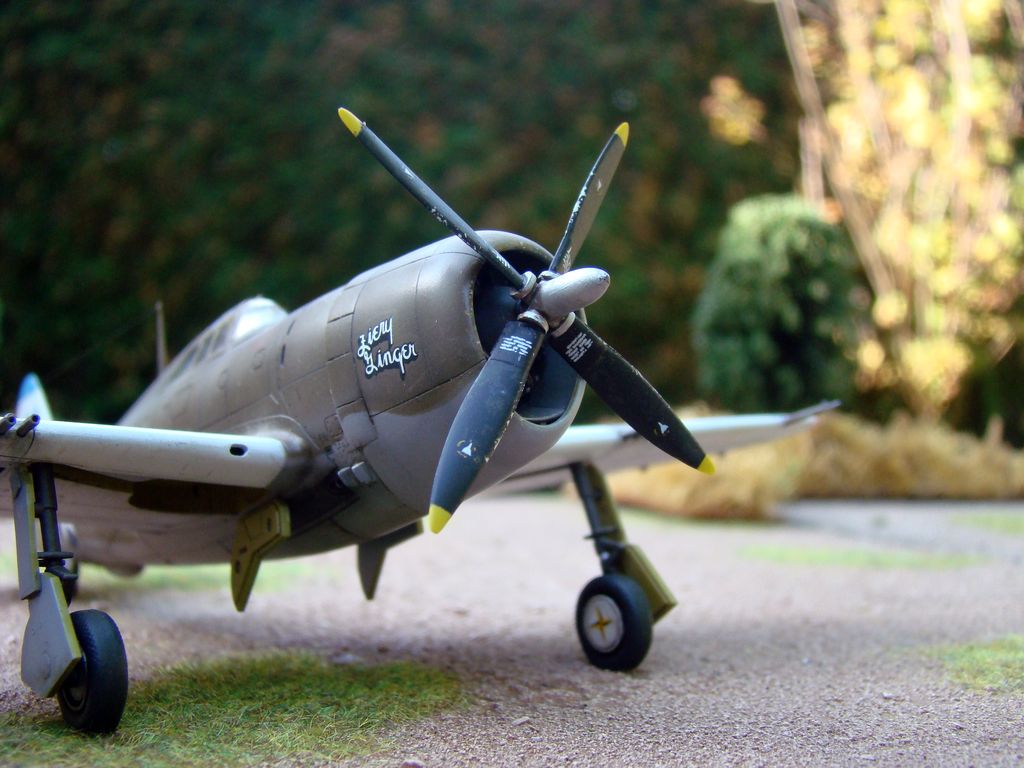
Another one recently finished, 1/72 P-47 from Academy with some little improvements and modifications.
[url=http://www.servimg.com/view/12298468/574]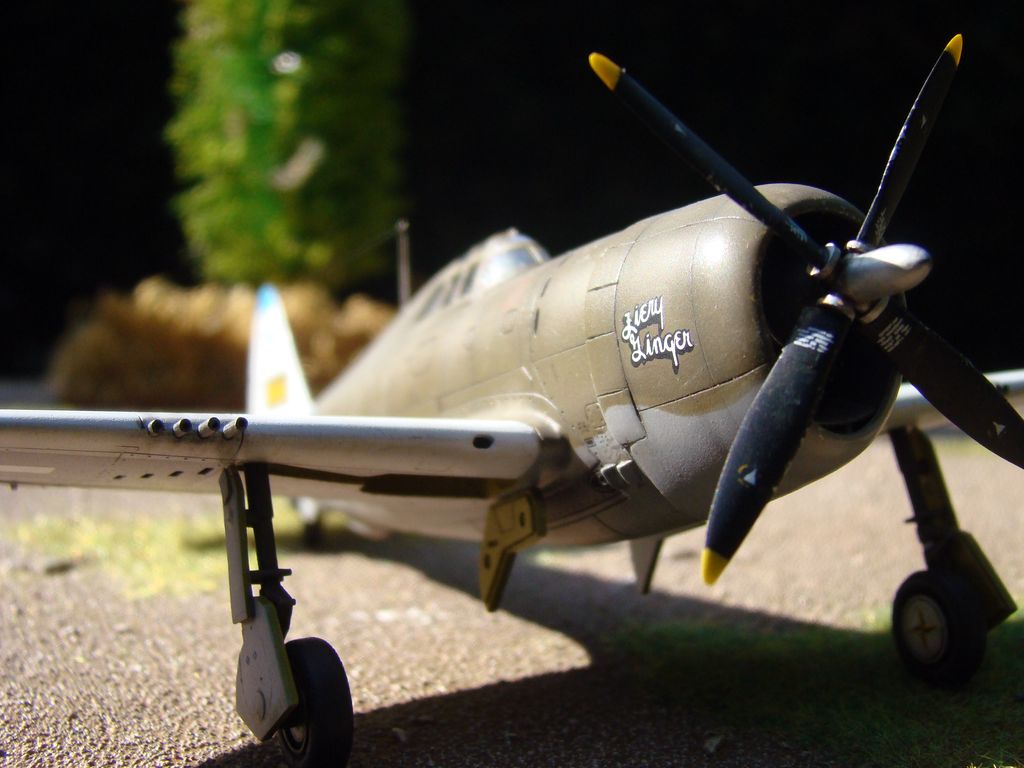 [/url
[/url
[url=http://www.servimg.com/view/12298468/574]
[/url
Re: Models exposed.
NIce really good job, I like it. Do yo have more?
Re: Models exposed.
Great work Secu!
“It is a mistake to think you can solve any major problems just with potatoes I-16s.” - Douglas Adams
-
Broadsword
- Posts: 3124
- Joined: Wed Sep 03, 2014 7:54 pm
- Location: Cheshire, UK
Re: Models exposed.
Lovely jug pictures 
I must go up to the skies again, to the peace of silent flight, To the gull’s way, and the hawk’s way, and the free wings’ delight;
And all I ask is a friendly joke with a laughing fellow rover, And a large beer, and a deep sleep, when the long flight’s over.
Re: Models exposed.
Latest instalment on the ME 109. Quite a bit done of late. I have completed the famous or infamous wheel wells on the aircraft, you will note I have completed the cannon and secured both wing halves . I initially decided to box them in with plastic card but after considering the options I went for "operation milliput". Operation Milliput being somewhat potentially the more messy option is in my opinion still the easier option given the complex shape of the wheel wells themselves, it requires patience and you may need to do this in several sessions. You will also need a small piece of scrap plastic that will fit into the wheel well itself but when inside is taller in height than the wheel well and will sit proud of what is the lower wing surface, it MUST have a 90 degree or right angle corner to use as an accurate spatula. Look at the pictures and I will explain, don't be shocked by what you see initially, it worked out good in the end. Here goes.
As it is to begin with. This is Milliput a two part "putty" with a good curing time and it sands well once "gone off". MIx the Milliput and roll out into a "sausage" wide high enough to completely cover your side wall and long enough to cover the complete circumference of the wheel well. We end up with something like this now.
As it is to begin with. This is Milliput a two part "putty" with a good curing time and it sands well once "gone off". MIx the Milliput and roll out into a "sausage" wide high enough to completely cover your side wall and long enough to cover the complete circumference of the wheel well. We end up with something like this now.
You do not have the required permissions to view the files attached to this post.
Last edited by Cerberus on Fri Mar 11, 2016 7:38 pm, edited 1 time in total.
Re: Models exposed.
You will also note I masked off the Cannons, I will be having the access ports closed on the finished model but I did not want "Milliput" on the barrels.
I masked with Tamiya tape all round the wheel well to avoid any mess on the surface of the wing and to protect the rivet details from the Milliput.
Now using our scrap piece of plastic as a right angle template ( lets call it the spatula), we start to form the Milliput into a wall, literally forcing it into the gap between the wing halves and around the inside of the wheel well. You may need to add a little water to the edge of the "spatula" to stop it sticking to the Milliput but it will start to take the shape of a vertical wall which is what we want. You may have a little rough surface but no problem as once its "gone off" we can then either gently sand it back or put a thin skin of Humbol filler over the top of the Milliput to smooth it out even further. You may need to add a blob of Milliput here and there as sometimes you will find the Millput disappears into the gap but keep going. Remove the Tamiya tape and voila.
Now using our scrap piece of plastic as a right angle template ( lets call it the spatula), we start to form the Milliput into a wall, literally forcing it into the gap between the wing halves and around the inside of the wheel well. You may need to add a little water to the edge of the "spatula" to stop it sticking to the Milliput but it will start to take the shape of a vertical wall which is what we want. You may have a little rough surface but no problem as once its "gone off" we can then either gently sand it back or put a thin skin of Humbol filler over the top of the Milliput to smooth it out even further. You may need to add a blob of Milliput here and there as sometimes you will find the Millput disappears into the gap but keep going. Remove the Tamiya tape and voila.
You do not have the required permissions to view the files attached to this post.
Last edited by Cerberus on Fri Mar 11, 2016 7:39 pm, edited 1 time in total.
Re: Models exposed.
Having let it all "Go Off" I game back to it a few days later and added a little Milliput here and there, sanding and applying a little Humbrol filler and once I sanded it all back I used a primer paint. I also took the opportunity to scratch build a little detail in the wells themselves by adding a couple of ribs out of plastic card. This is what we end up with.
A view of the airframe so far.
You do not have the required permissions to view the files attached to this post.